What is HTTPS?
HTTPS stands for “Hypertext Transfer Protocol Secure”. It is an internet protocol that allows for the secure flow of information between a server (website) and client (whoever is accessing the server). HTTPS sites provide numerous benefits over HTTP for internet users, including:
- Authentication - ensures that the intended website is shown to users
- Data encryption - prevents unwanted tracking or information stealing
- Data integrity - prevents data from alteration during transfer
Does HTTPS Matter for SEO?
For years, Google has been promoting internet safety and security. In 2018, Google began marking all sites not using HTTPS as “Not secure” in Chrome. At times, Google has even gone as far as to test marking HTTP sites as “not secure” directly within SERPs. Between Google’s direct negative non-secure site labeling and all of the positive benefits of HTTPS for users, it is a no-brainer for webmasters to migrate their sites to HTTPs.
HTTPS Not Secure - What Gives?
While the majority of websites have already migrated to HTTPS, HTTPS sites can still be labeled as not secure. There are two main ways that this can happen:
- Calls to non-secure 3rd party resources like images, Javascript, and CSS
- Expired, missing, or invalid SSL certificates
In Chrome, you can tell that a webpage is non-secure when there is a “Not secure” label instead of a padlock to the left of the address in the Omnibox.
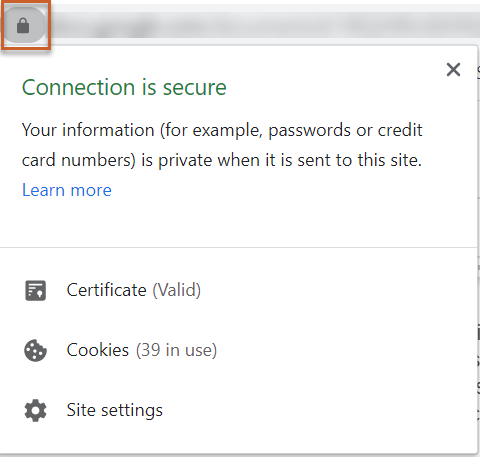
Secure webpage
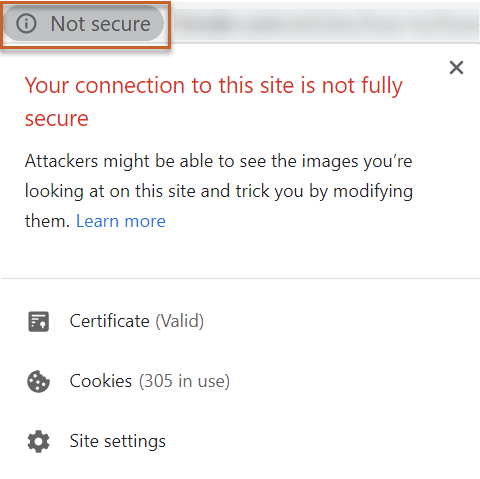
Non-secure webpage
How to Fix the HTTPS Not Secure Message in Chrome
Using Chrome DevTools (Inspect Element)
I promise that this is much easier than it sounds. With a few simple clicks, you can identify what is causing your HTTPS page to be not secure directly in Chrome using DevTools. When you are on the page that you want to investigate, enter Ctrl+Shift+i to open DevTools. You can also right-click anywhere on the page and click “Inspect”.
Once DevTools is open, toggle to “Security”:
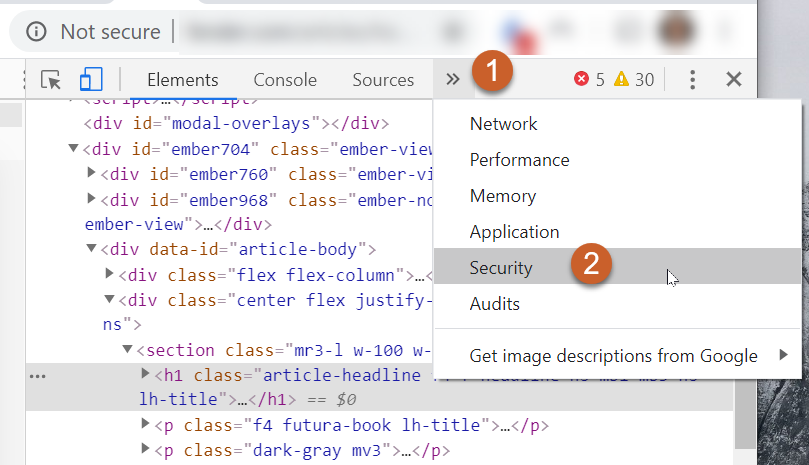
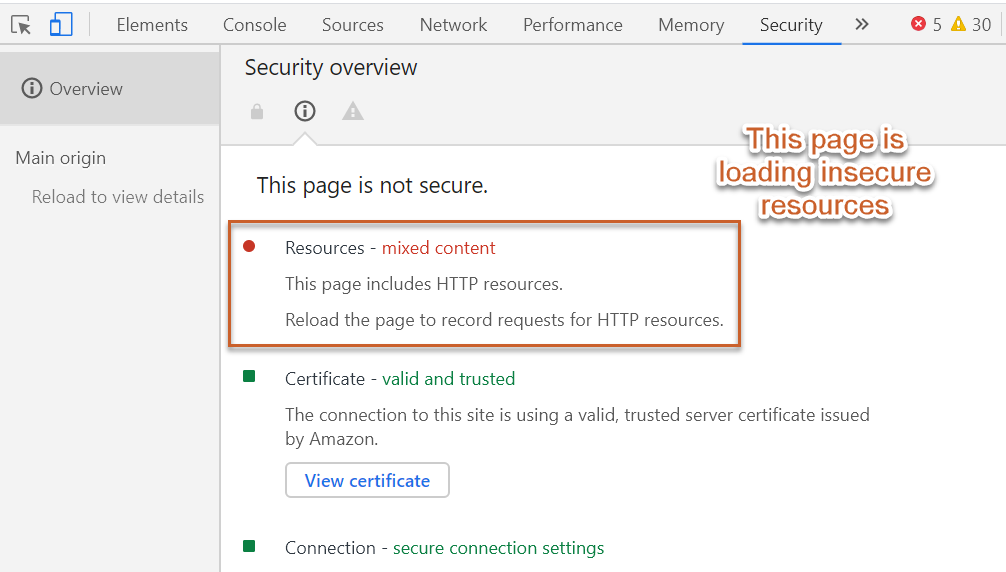
From here, you will be able to see what is causing your page to be non-secure. In this example, the page is loading non-secure resources. If you refresh the page, Google will show you the specific resources that are causing problems.
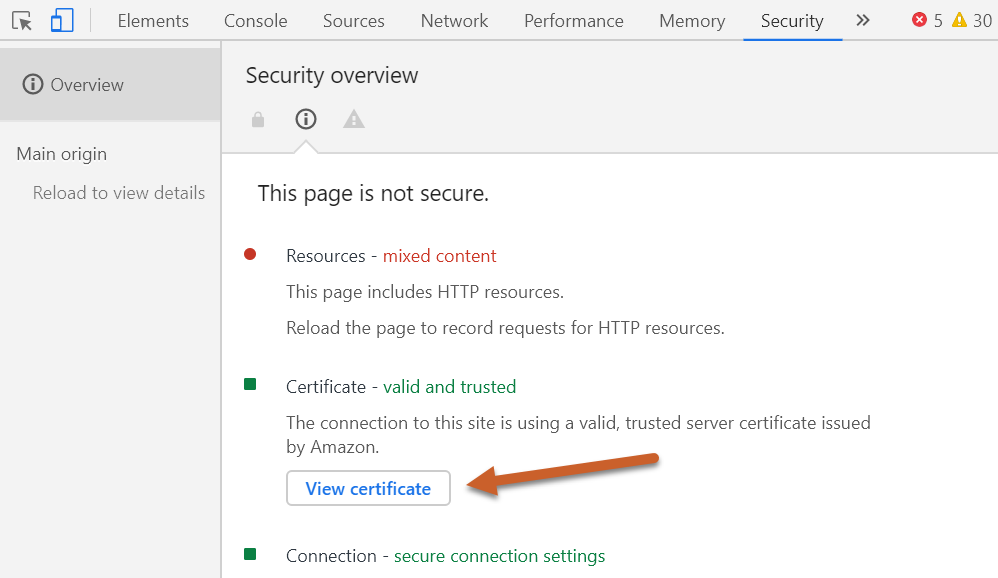
If you had an expired, missing, or invalid SSL certificate, that would appear here as well. If you click “View certificate”, you can see all of the details of your current certificate, including who issued it and when it expires.
If your SSL certificate is invalid, you can follow Google's guidelines to configure a trusted SSL certificate.
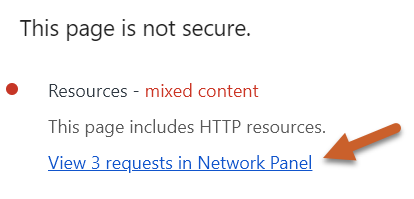
Back to the insecure resources - once you reload the page, Google will show you how many there are. Click “View # requests in Network Panel” to proceed.
Now you should be able to see the specific resources that are non-secure. My example webpage is loading 3 images from an external website that is not secure.
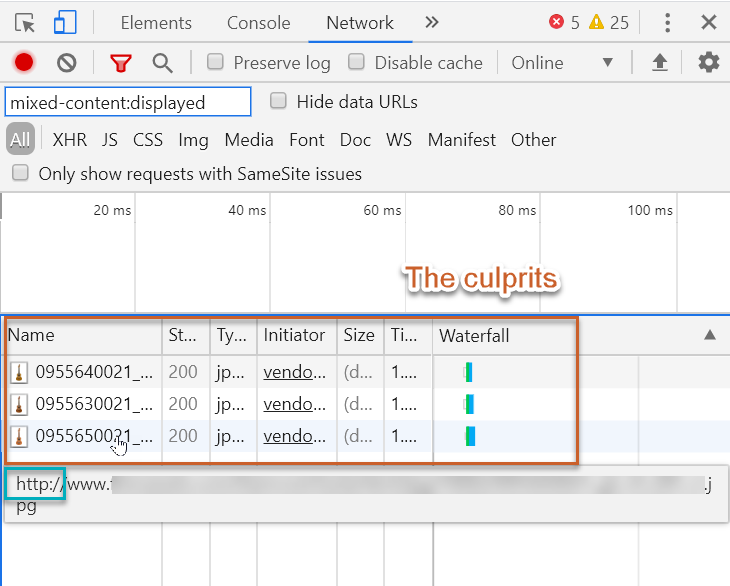
This is a fairly common case where a website hosts images on a secondary domain. The problem is that the secondary domain is not secure (you can see the “http://” in the address of the image above), so all images loaded from the non-secure site are also non-secure. So in this case, 3 tiny external images are causing the entire HTTPS webpage to be labeled as “non-secure” by Google.
To solve the HTTPS not secure problem, you could choose a different secure host for your resources. If you own the secondary domain and intend to use it moving forward, then you should follow the instructions to migrate that domain to HTTPS.
How to Identify Non-Secure Resources at Scale with Screaming Frog
Now you may be thinking, “that’s easy enough, but how can I find all of the pages and resources on my site that are not secure?”. Luckily, Screaming Frog has a report that makes this easy. If you are new to Screaming Frog, Seer has a comprehensive guide to help you get started.
First, crawl your website. Ensure that you are crawling images, CSS, and Javascript within the spider configuration (default). Once the crawl is complete, click “Reports” in the top ribbon, then “Insecure Content”. This will prompt a CSV report download to your computer.
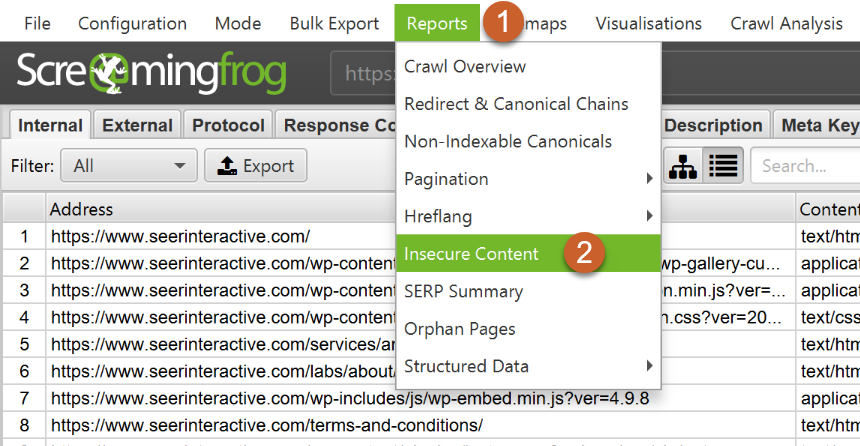
The report itself will show you what type of insecure resources live on your site (if any), and where you can find them. From here, you will need to determine how to update or replace the resources to make them secure.

Summary
We’ve walked through how to check your SSL certificate, and how to identify non-secure resources on your HTTPS site, both manually and at scale. Hopefully, you are able to able to address your site’s security problems and restore your Omnibox padlock to its former glory. Do you have any other tips for identifying non-secure resources on HTTPS sites? Drop them in the comments below!


