Google Shopping has been an integral part of strategy for my eCommerce clients by driving Non-Brand equity and providing opportunity for continued expansion. In fact, I have a client where Google Shopping alone accounted for 58% of total revenue so far this year.
I wanted to continue to expand on the success of Shopping campaigns, so I imported my Google Shopping campaigns to Microsoft Advertising Shopping. I found Microsoft’s process to be a bit less intuitive than Google and couldn’t find a really good resource. The following steps outline the process to getting your Shopping campaigns set up on Microsoft so you can continue success with your Shopping campaigns.
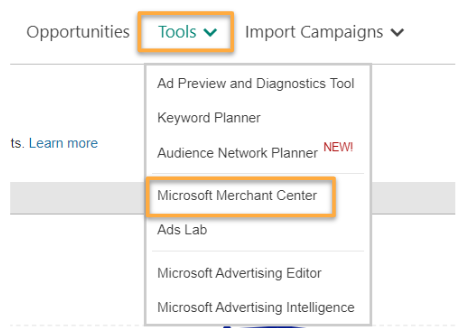
Step 1: Access the Microsoft Merchant Center.
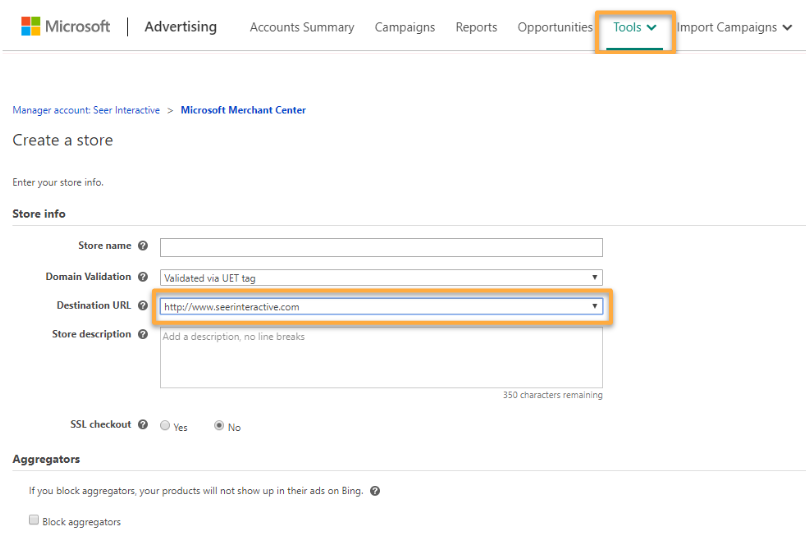
Step 2: Create Your Store.

Step 3: Verify URL via Bing Webmaster Tools or by Validated UET Tag.
Step 4: Create & Upload Your Product Catalog

You can import your Shopping Feed manually using a file, via FTP or by using the Google Merchant Center (GMC) Import tool.
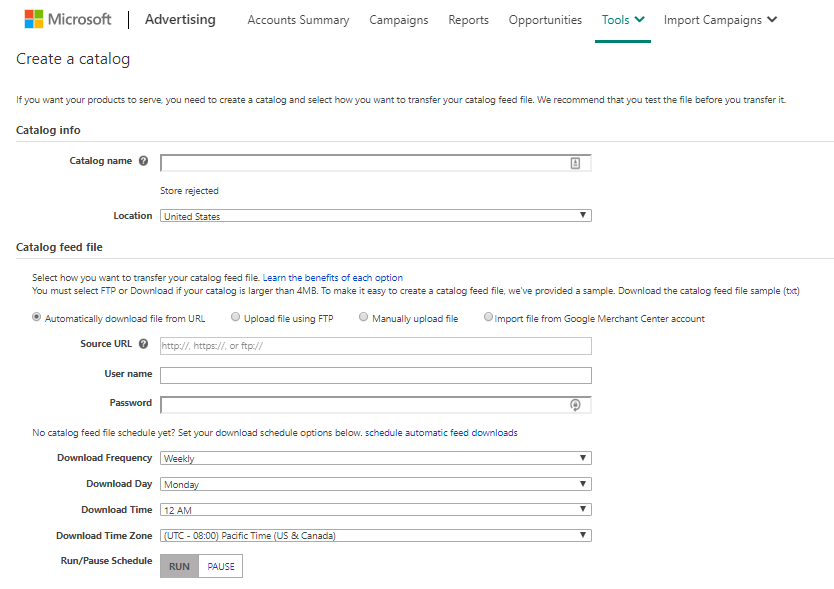
Step 5: Create Your Microsoft Shopping Campaign.
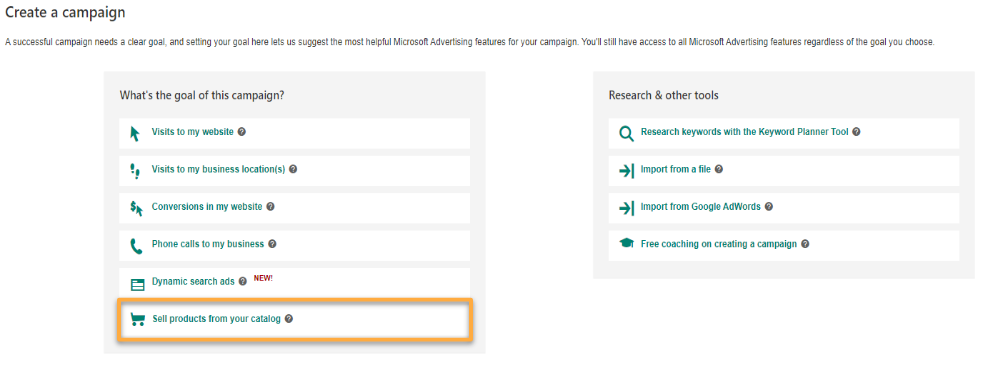
Step 6: Add Product Targets.
I would recommend keeping this one to targeting “All Products” and then breaking our more granular ad groups by similar products based on type, price/margin, etc. The “All Products” ad groups would never actually go live.
[TIP]
Microsoft Ads cannot show complete data if your campaign has more than 1 million offers from the store. To see complete data, go to your Campaign Settings and select Filter Products to narrow the offer list to fewer than 1 million items.
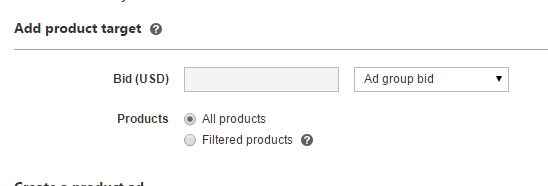
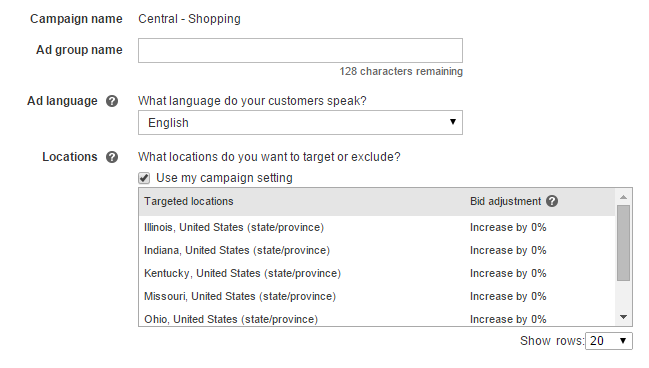
Step 7: Create Ad Group(s)
Create Ad Groups for your Shopping campaign sjst as you would for any other campaign. Set your ad language and locations targeting/exclusions.
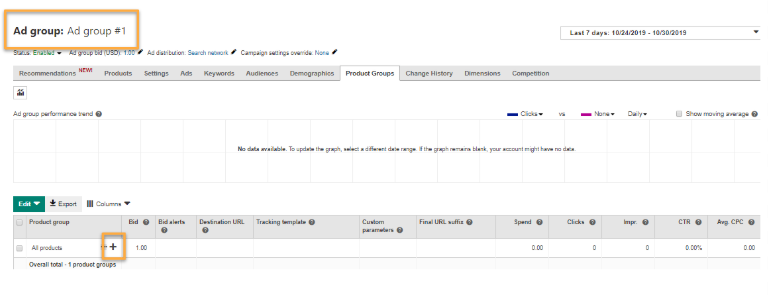
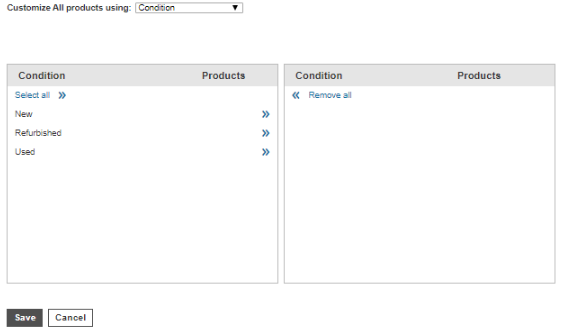
Step 8: Add Product/Product Group Targets
This is where I would recommend breaking out your ad groups into specific product groupings. For example, one ad group may be designated for “New” Products and another for “Used” Products. You can also do this at the campaign level to better monitor the budget.
Step 9: Create Product Ad With Promotional Text.
Select product ad from the ad type dropdown. Promotional text is an optional text that is displayed when a user hovers over your product ad. If applicable, we highly recommend adding to help boost CTR.

Step 10: Review All Settings & Thoroughly QA
We always recommend a second set of eyes (or two) to review all intended campaign settings match actual campaign settings.
And that’s it! 🙌 Now you can launch your Shopping campaigns and start collecting data on Microsoft Advertising.
Some helpful pointers before you get started are listed below:
- Microsoft calls the product feed a “catalog”.
- Microsoft Merchant Center only accepts products that are currently in stock so remove out-of-stock products before uploading the catalog.
- Microsoft Catalog headers are slightly different from Google so pay careful attention to use the right headings.
- If you use Feedonomics for Feed Management on Google Ads, you can import this feed into your Microsoft Ads Catalog. Connect with your Feedonomics representative for more information.
- Files that are manually uploaded should be in .txt file format.
- Average Position and Quality Score metrics for Product Ads reported in the interface are not accurate and should be ignored.
- Microsoft Advertising Editor is an easy alternative for getting Shopping campaigns/ad groups/product targets set up that follows the same process outlined above. One thing to note, however, is that you cannot create the Product Ad campaigns in the interface, though you can create ad groups, product targets and ads.
- It is recommended that Aggregators are Blocked when creating your Merchant Center Store.
- If you use search partners in Shopping Campaigns, your dedicated Microsoft Advertising rep can provide you with a report to show how placements are performing. From there, you can exclude poor placements.

