You know that Sarah Jessica Parker movie, “I Don’t Know How She Does It” or “How Does She Do It” or “What’s She Doing and Why Is She Wearing That?” Whatever that movie is called, that’s what I’m like. How do I do it all? By setting Google Automated Rules to do my work for me while I’m sleeping!
Did you know that instead of losing valuable beauty sleep uploading bulk sheets for 2am price changes you could be having Google make those changes for you? If you know you can do it, are you taking advantage of this capability? What follows below is a quick step by step for letting Google make ad copy changes for you!
To Pause Existing Ads…
Step One – Upload Your New Ads
Upload your promotional/new price point ads in a paused state. If these ads have a unique identifying phrase(i.e., “Doorbuster Sale” or “Ends Friday!”) you will be able to segment out these ads using a text filter. If the ads do not contain unique wording you’ll want to apply labels to the new ads. For price changes I like to label ads with the date of the update for easy reference later. That’s just me, I’m a nut.
Step Two – Go To the Automated Rule Interface
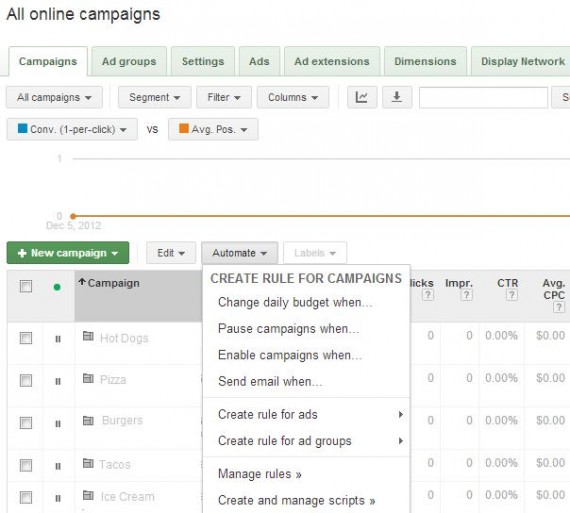
From the Campaigns tab of the AdWords interface, select the “Automate” button

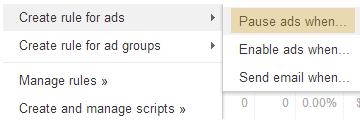
Select “Pause ads when…” or “Enable ads when..”

As an example I’ll walk through setting a rule to pause all existing ads and then setting another rule to activate promotional ads.
Step Three – Define the Ads You Want Impacted
You can do this by filtering for a key phrase within the ad text or using labels, as I mentioned above.
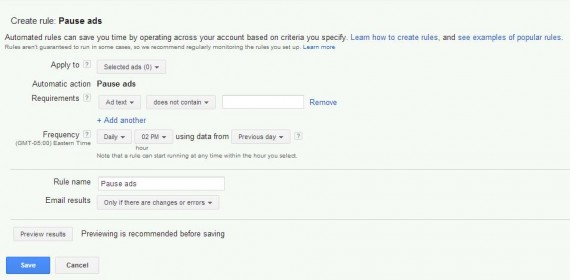
To pause all ads, enter the Automate Rule “Pause Ads When…” Interface.

Select “All enabled ads from all campaigns” in from the “Apply To” dropdown.
![]()
In this example we are pausing all ads currently running, and have already specified “all enabled ads in all campaigns,” so we don’t need to set up any requirements.
Step Four – Set the Frequency
For a one-time as copy swap you’ll want to set the frequency to….One Time. Then just specify the date and time that your promotion/price change goes into effect. You can leave the “using data from” option as is, since we aren’t taking any data into account here.

Step Five – Preview and Save
Hit “Preview Results” and make sure the right number of ads are being affected, and then save! You’ve set your first ad swap rule!
To Enable Your New Promotional Ads…
Step Two - Go To the Automated Rule Interface
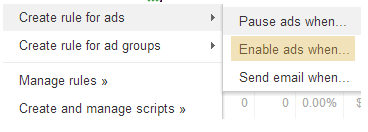
Select “Enable ads when..”

Step Three – Define the Ads You Want Impacted
This time you’ll want to set the “Apply to” field to “All but deleted ads in all campaigns.” Don't worry, we'll tell Google which ads to activate specifically in just a second.

Under requirements you can either filter for a phrase pertaining to your specific promotion

Or if you’ve gone the label route, you can set a filter for your labeled set.

Step Four and Five – Set the Frequency, Preview and Save
Just as before, we’ll want to set the frequency to “One Time,” update the Date and Time fields and then Preview and Save.
Congratulations, you just bought yourself an extra hour of sleep! Go forth and be productive!

